Jamie Oliver’s Key Lime Pie is a zesty, creamy, and refreshing dessert that combines the tartness of fresh lime juice with a smooth, velvety filling and a crisp biscuit crust. This easy-to-make pie is perfect for any occasion, balancing sweetness and citrusy tang in every bite.
Why This Recipe Is a Must-Try
- Rich and creamy texture: The filling is silky smooth with a perfect balance of sweetness and tartness.
- Easy to make: Uses simple ingredients and minimal effort.
- Refreshing citrus flavor: The lime zest and juice add a fresh, tangy kick.
- Crunchy biscuit base: A buttery, crisp crust contrasts beautifully with the creamy filling.
- Perfect make-ahead dessert: This can be prepared and chilled before serving.
What Is Jamie Oliver’s Key Lime Pie?
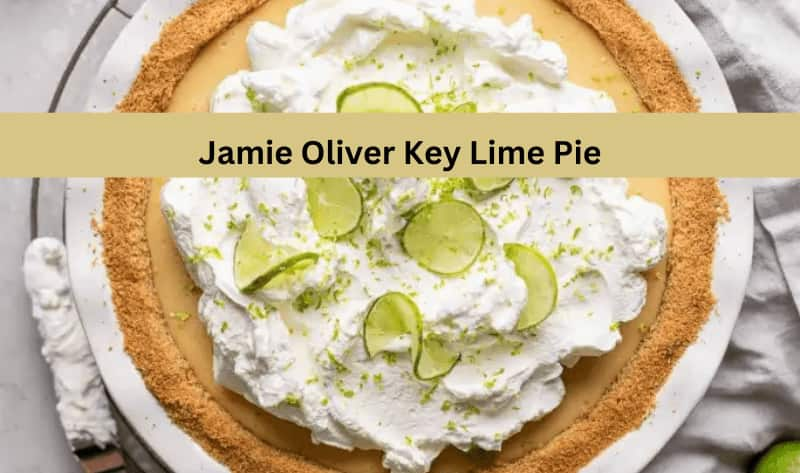
Key Lime Pie is a classic citrus dessert made with a graham cracker or digestive biscuit crust, a tangy lime-infused condensed milk filling, and a whipped cream topping. It is traditionally made using key limes, but regular limes work just as well.

Other Recipes
- Jamie Oliver Vanilla Custard
- Jamie Oliver Hot Chocolate
- Jamie Oliver Rice Pudding with Strawberry Jam
Jamie Oliver Key Lime Pie Ingredients
For the Crust:
- 250g (2 cups) digestive biscuits or graham crackers, crushed
- 100g (½ cup) unsalted butter, melted
- 1 tbsp sugar (optional)
For the Filling:
- 400g (1 can) sweetened condensed milk
- 3 large egg yolks
- 120ml (½ cup) fresh lime juice (preferably key limes)
- Zest of 2 limes
For the Topping:
- 250ml (1 cup) heavy cream
- 2 tbsp icing sugar
- Lime zest, for garnish
Step-by-Step Instructions to Prepare Jamie Oliver Key Lime Pie
Step 1: Prepare the Crust
- Preheat the oven to 180°C (350°F).
- Crush the biscuits into fine crumbs using a food processor or rolling pin.
- Mix the crumbs with melted butter and sugar until well combined.
- Press the mixture into a 23cm (9-inch) pie tin, covering the bottom and sides evenly.
- Bake for 10 minutes, then let it cool.
Step 2: Make the Filling
- In a bowl, whisk the egg yolks until slightly thickened.
- Stir in the condensed milk, followed by the lime juice and zest.
- Mix well until smooth and creamy.
Step 3: Bake the Pie
- Pour the filling into the cooled crust and bake for 15 minutes until just set.
- Remove from the oven and let it cool completely before refrigerating for at least 3 hours.
Step 4: Prepare the Whipped Cream Topping
- Whip the heavy cream and icing sugar until soft peaks form.
- Spread or pipe the whipped cream over the chilled pie.
- Garnish with lime zest for extra freshness.
Step 5: Serve and Enjoy
- Slice and serve chilled for the best taste and texture.

What to Serve with Jamie Oliver Key Lime Pie
- Fresh lime slices: Enhances the citrusy flavor.
- Crushed biscuit crumbs: Adds texture to the topping.
- Caramel drizzle: A touch of sweetness for contrast.
- Mint leaves: For a fresh and elegant presentation.
- Extra whipped cream: Because you can never have too much!
Expert Tips for Mastering Jamie Oliver Key Lime Pie
- Use fresh lime juice: It makes a big difference in flavor compared to bottled juice.
- Chill thoroughly: The pie needs at least 3 hours in the fridge to set properly.
- Don’t overbake: The filling should be slightly wobbly when removed from the oven.
- Whip cream just right: Soft peaks create a light, airy topping.
- Balance the sweetness: If you prefer a less sweet pie, reduce the condensed milk slightly.
Variations of Jamie Oliver’s Key Lime Pie
- Gluten-free version: Use gluten-free biscuits for the crust.
- Dairy-free option: Substitute coconut condensed milk and dairy-free whipped topping.
- Extra tangy pie: Add a little more lime zest for a stronger citrus kick.
- Chocolate twist: Mix cocoa powder into the crust for a chocolate-lime combo.
- No-bake version: Skip baking and chill the crust before adding the filling.
How to Store Leftovers Jamie Oliver Key Lime Pie?
- Refrigerate: Store covered in the fridge for up to 3 days.
- Freeze: Freeze without the whipped topping for up to 2 months; thaw before serving.
How to Reheat Jamie Oliver Key Lime Pie?
- Best served cold: This pie is not meant to be reheated.
- For a firmer texture: Freeze for 15 minutes before serving.
Nutrition Value (Per Serving)
- Calories: 350
- Protein: 6g
- Carbohydrates: 45g
- Fat: 18g
- Fiber: 1g
FAQs
Can I use regular limes instead of key limes for key lime pie?
Yes, regular limes can be used as a substitute for key limes. While key limes have a more aromatic and slightly sweeter taste, fresh regular lime juice still delivers great flavor.
How do I make my key lime pie filling thicker?
Ensure you use sweetened condensed milk, as it helps create a creamy and thick consistency. Also, baking the filling for about 15 minutes helps it set properly.
Can I make key lime pie ahead of time?
Yes, key lime pie is a great make-ahead dessert. Prepare and refrigerate it for up to 2 days before serving. Add the whipped cream topping just before serving for the best texture.
Why did my key lime pie crack on top?
Overbaking can cause cracks in the filling. The pie should be slightly wobbly when removed from the oven, as it continues to set while cooling.
Final Words
Jamie Oliver’s Key Lime Pie is a creamy, tangy, and refreshing dessert that is easy to prepare and always a crowd-pleaser. With its zesty lime filling and buttery biscuit crust, this pie is perfect for any occasion. Try making it today and enjoy a slice of citrusy goodness!
More Jamie Oliver Recipes
Print
Jamie Oliver Key Lime Pie Recipe
- Prep Time: 20
- Cook Time: 25
- Total Time: 45 minutes
- Yield: 8 1x
- Category: Dessert
- Method: Baking
- Cuisine: British
Description
Jamie Oliver’s Key Lime Pie is a zesty, creamy, and refreshing dessert that combines the tartness of fresh lime juice with a smooth, velvety filling and a crisp biscuit crust. This easy-to-make pie is perfect for any occasion, delivering a balance of sweetness and citrusy tang in every bite.
Ingredients
For the Crust:
-
- 250g (2 cups) digestive biscuits or graham crackers, crushed
-
- 100g (½ cup) unsalted butter, melted
-
- 1 tbsp sugar (optional)
For the Filling:
-
- 400g (1 can) sweetened condensed milk
-
- 3 large egg yolks
-
- 120ml (½ cup) fresh lime juice (preferably key limes)
-
- Zest of 2 limes
For the Topping:
-
- 250ml (1 cup) heavy cream
-
- 2 tbsp icing sugar
-
- Lime zest, for garnish
Instructions
Step 1: Prepare the Crust
-
- Preheat the oven to 180°C (350°F).
-
- Crush the biscuits into fine crumbs using a food processor or rolling pin.
-
- Mix the crumbs with melted butter and sugar until well combined.
-
- Press the mixture into a 23cm (9-inch) pie tin, covering the bottom and sides evenly.
-
- Bake for 10 minutes, then let it cool.
Step 2: Make the Filling
-
- In a bowl, whisk the egg yolks until slightly thickened.
-
- Stir in the condensed milk, followed by the lime juice and zest.
-
- Mix well until smooth and creamy.
Step 3: Bake the Pie
-
- Pour the filling into the cooled crust and bake for 15 minutes until just set.
-
- Remove from the oven and let it cool completely before refrigerating for at least 3 hours.
Step 4: Prepare the Whipped Cream Topping
-
- Whip the heavy cream and icing sugar until soft peaks form.
-
- Spread or pipe the whipped cream over the chilled pie.
-
- Garnish with lime zest for extra freshness.
Step 5: Serve and Enjoy
-
- Slice and serve chilled for the best taste and texture.


